
Creating an automated email sequence
To add a project, follow these steps:

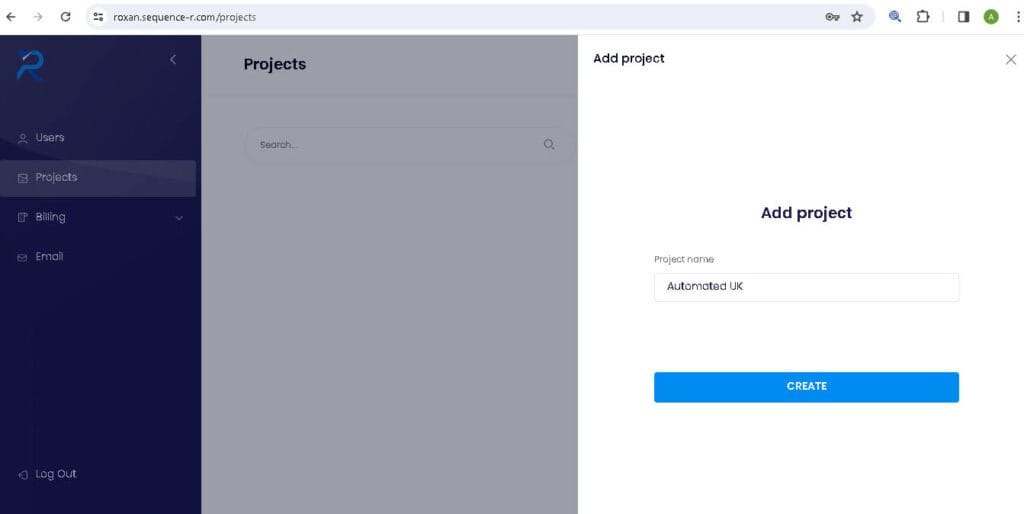
- On the left-hand side, click on “Project”.
- Click on “Add Project”.
- Enter a name for the project and click “Save”.
- The project will now appear on the main project page and on the left side of the screen.
Setting up the Sequence
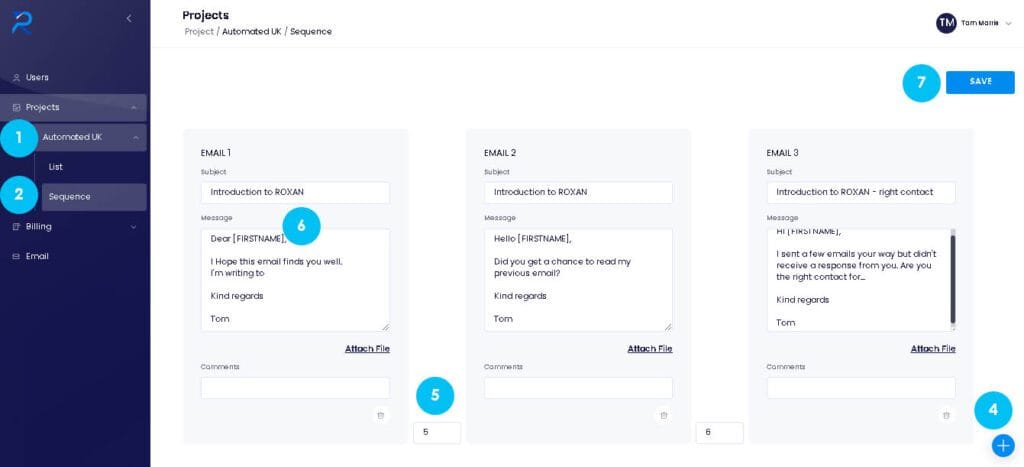
- On the left-hand side of the screen, click on the project name to expand the list of options.
- Click on the “Sequence” tab.
- By default, the system displays three empty emails, but you can add more or fewer emails as needed.
- To add an extra email, click on the “+” button at the bottom right of the screen.
- Fill in the emails as desired and add the desired delay between each email in the “x days” fields.
- You can use predefined words called placeholders that the system will replace with elements from the email list. The available placeholders are: [SLT] for salutation, [FIRSTNAME] for first name, [SURNAME] for last name, [COMPANY] for company name, and [JOB] for title.
- Once you are done, click “Save”.
- The sequence will need to be “Approved” before it can be sent. An “Approve sequence” button will appear after saving. If you have the necessary rights, simply click that button.
Setting up the sending account and contact list
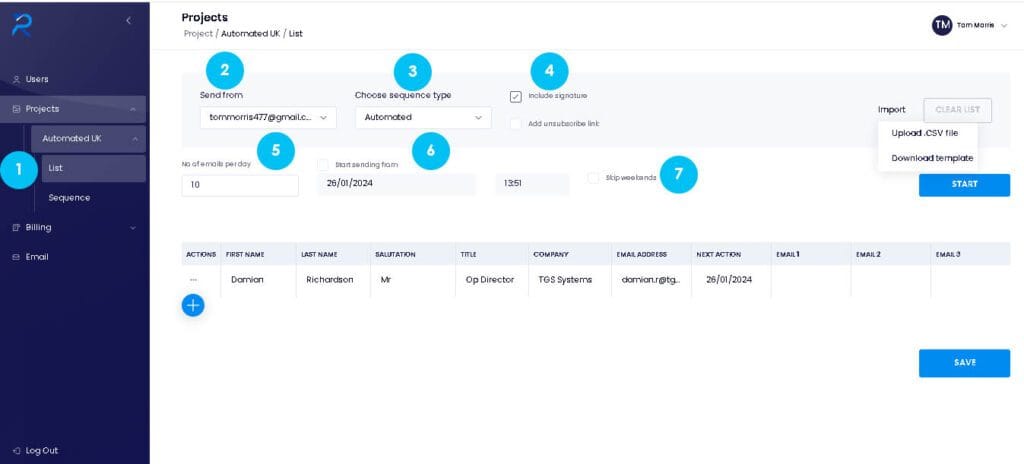
- Go to the “List” tab.
- Select the sending account from the “Send from” dropdown menu. If no email appears, you need to connect your email account.
- Choose the sequence type as “Automated”.
- If you want to include the account signature (defined in the email tab), tick the “Include signature” option.
- Specify how many emails you would like to send per day.
Note: It is recommended to start with a lower number of emails per day and gradually increase it over the first few weeks to warm up a new account. It is also advisable to limit the number of emails sent per account to 50 per day. - Select the start date and time for the campaign.
- If you want to skip weekends, tick the corresponding box.
Creating or importing a contact list
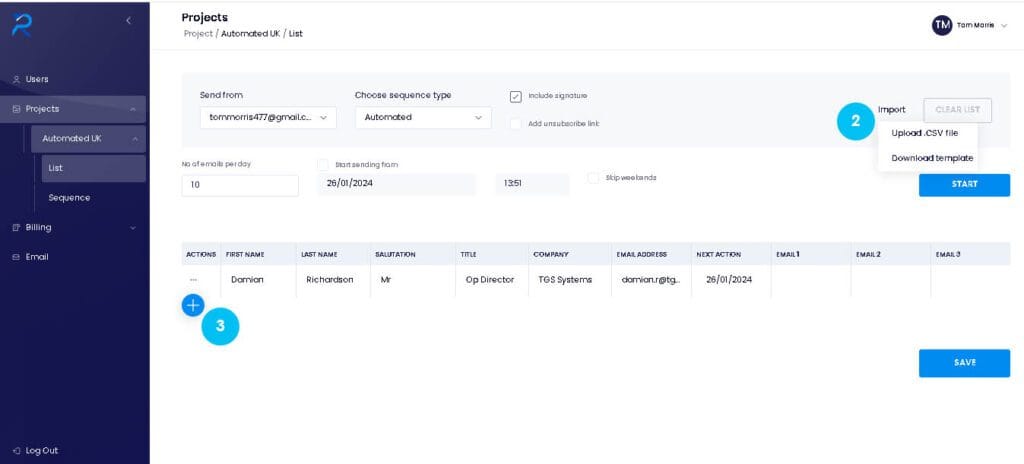
- There are two options available: import and manual adding.
- To import contacts, click on “Import” next to the “Clear list” option and download the CSV template. Fill in the contact details following the provided format and upload the file back to the system.
- To manually add contacts, click on the “+” button on the left-hand side of the list. Fill in the relevant fields and click “Save”.
Once you have completed these steps, simply click “Start” when you are ready to begin the campaign.
Create an automated campaign – video
