
Manual sequences provide you with a level of control over the sequencing process, unlike fully automated sequences. Instead of automatically sending emails, the emails are created as drafts, allowing you to review and modify the content before sending. This option is particularly useful if you prefer to personalise each email or if you need to copy and paste the email into a specific CRM system, for example.
Creating a Manual project
First, create a project.


- On the left-hand side, click on “Project”.
- Click on “Add Project”.
- Enter a name for the project and click “Save”.
- The project will now appear on the main project page and on the left side of the screen.
Setting up the Sequence
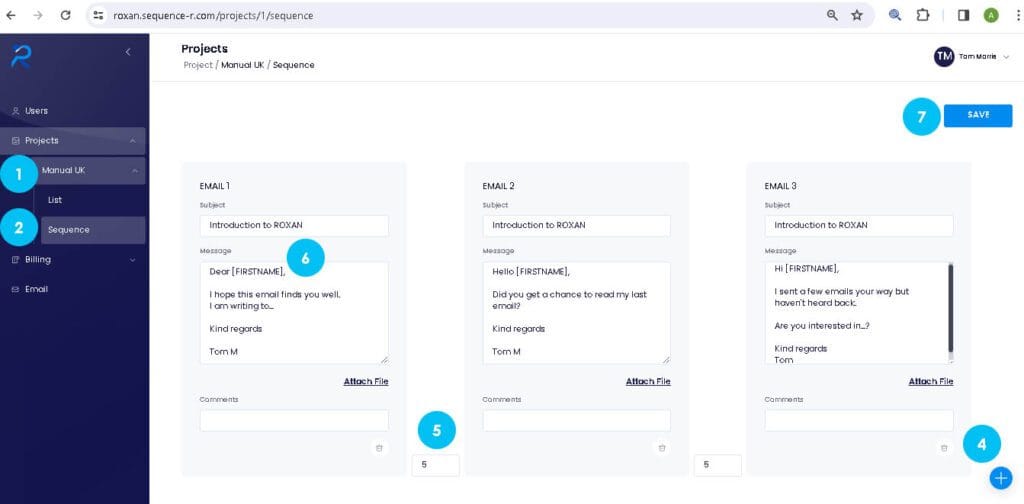
- On the left-hand side of the screen, click on the project name to expand the list of options.
- Click on the “Sequence” tab.
- By default, the system displays three empty emails, but you can add more or fewer emails as needed.
- To add an extra email, click on the “+” button at the bottom right of the screen.
- Fill in the emails as desired and add the desired delay between each email in the “x days” fields.
- You can use predefined words called placeholders that the system will replace with elements from the email list. The available placeholders are: [SLT] for salutation, [FIRSTNAME] for first name, [SURNAME] for last name, [COMPANY] for company name, and [JOB] for title.
- Once you are done, click “Save”.
- The sequence will need to be “Approved” before it can be sent. An “Approve sequence” button will appear after saving. If you have the necessary rights, simply click that button.
Setting up Manual sequence and contact list
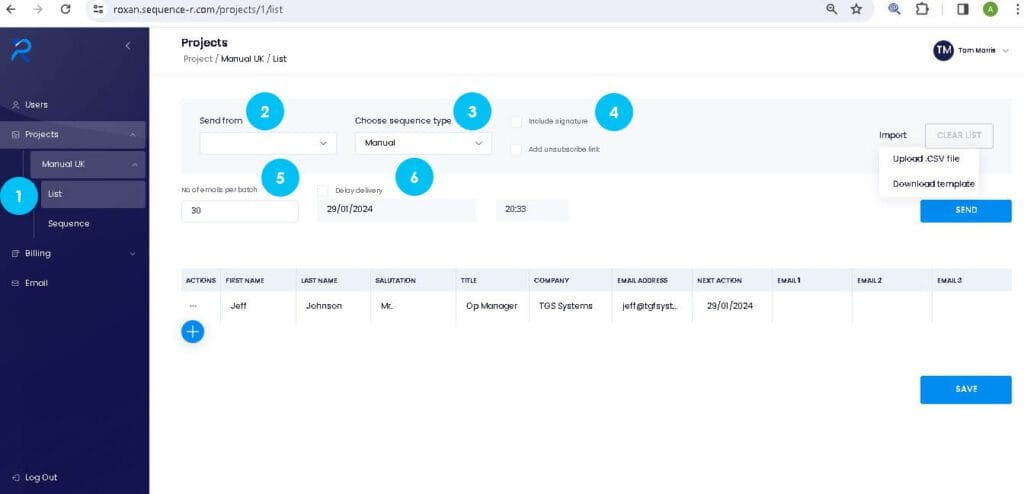
- Go to the “List” tab.
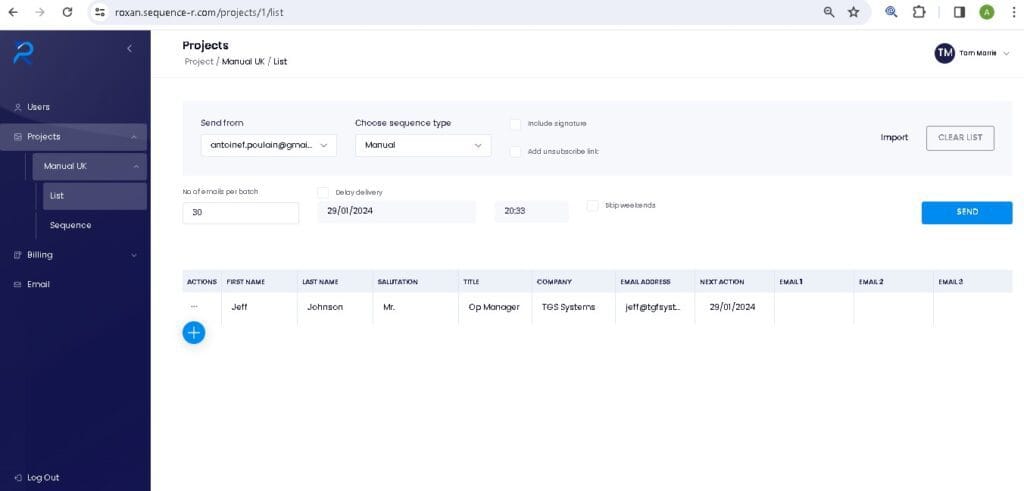
- Select the sending account from the “Send from” dropdown menu. If no email appears, you need to connect your email account.
- Choose the sequence type as “Manual”.
- If you want to include the account signature (defined in the email tab), tick the “Include signature” option.
- Specify how many emails you would like to send per day.
Note: It is recommended to start with a lower number of emails per day and gradually increase it over the first few weeks to warm up a new account. It is also advisable to limit the number of emails sent per account to 50 per day. - Select the date and time you want the email to send from your outbox. Note that the system takes into account a 1min delay between each email being sent.
Creating or importing a contact list
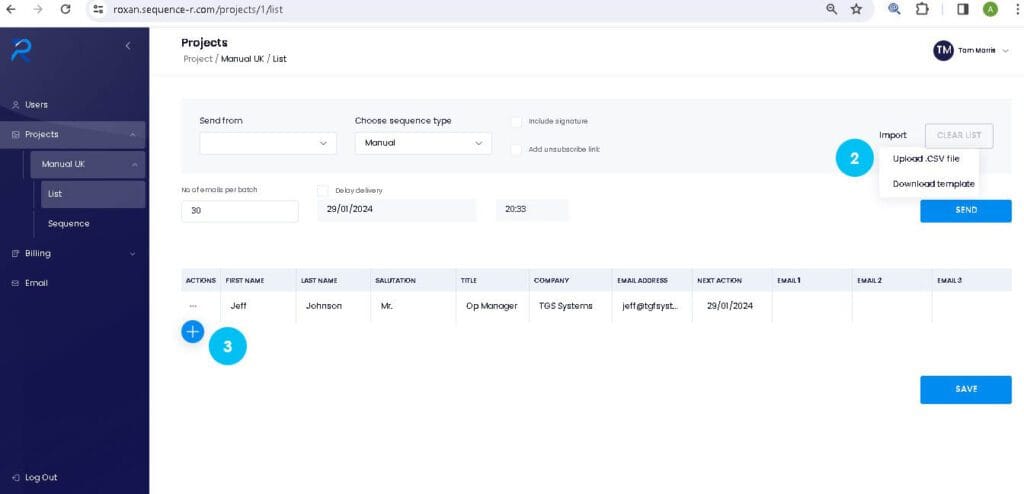
- There are two options available: import and manual adding.
- To import contacts, click on “Import” next to the “Clear list” option and download the CSV template. Fill in the contact details following the provided format and upload the file back to the system.
- To manually add contacts, click on the “+” button on the left-hand side of the list. Fill in the relevant fields and click “Save”.
Scheduling and sending
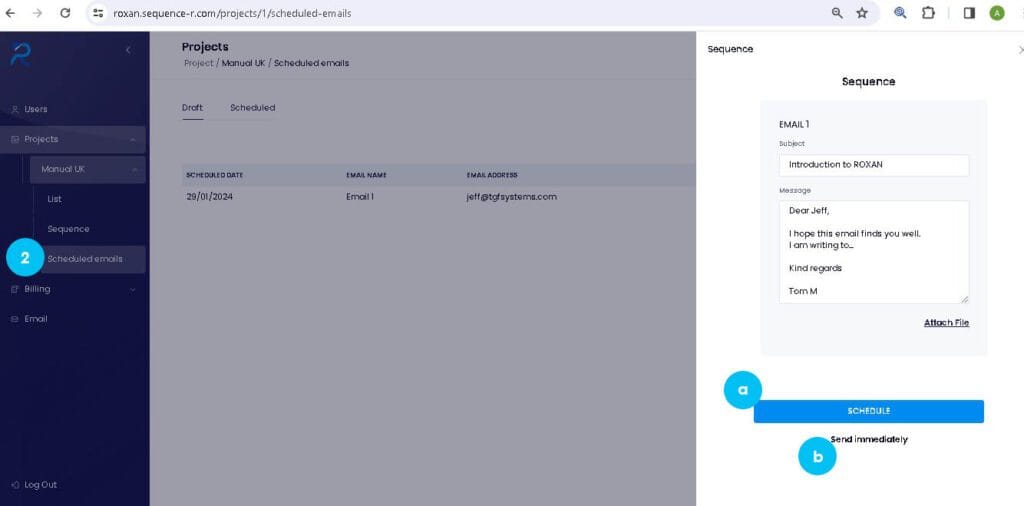
- Once you have configured the desired settings, click on the “Send” button.
- The emails will be created and saved in the draft section of the “Scheduled emails” tab.
- On the right-hand side of the screen, click on “Scheduled emails”.
- Select the “Draft” option.
- For each email, click on the three dots “…” to preview the content of the email.
- If necessary, make any edits to the email.
- Choose one of the following options for sending the email:
a) “Schedule” – The email will be sent only when the specified date is reached.
b) “Send immediately” – The email will be sent immediately, disregarding any previous settings. - The email will then appear in the “Scheduled” section.
Note: If you notice any errors, you can always delete the email in the scheduled section and remove the date from the list to regenerate the email.